
The 5 Smart Design Moves
Simple upgrades that make your basement brighter, smarter, and built to last.
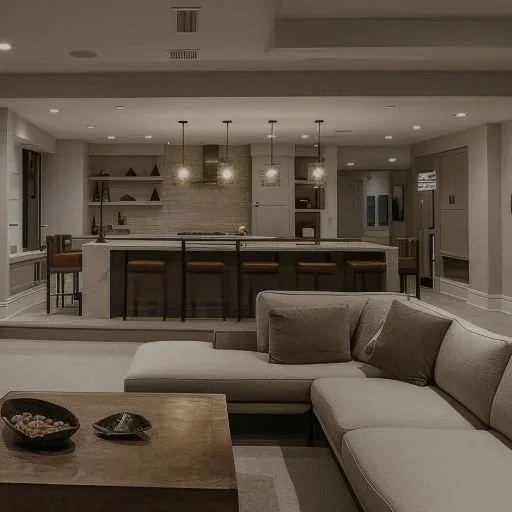
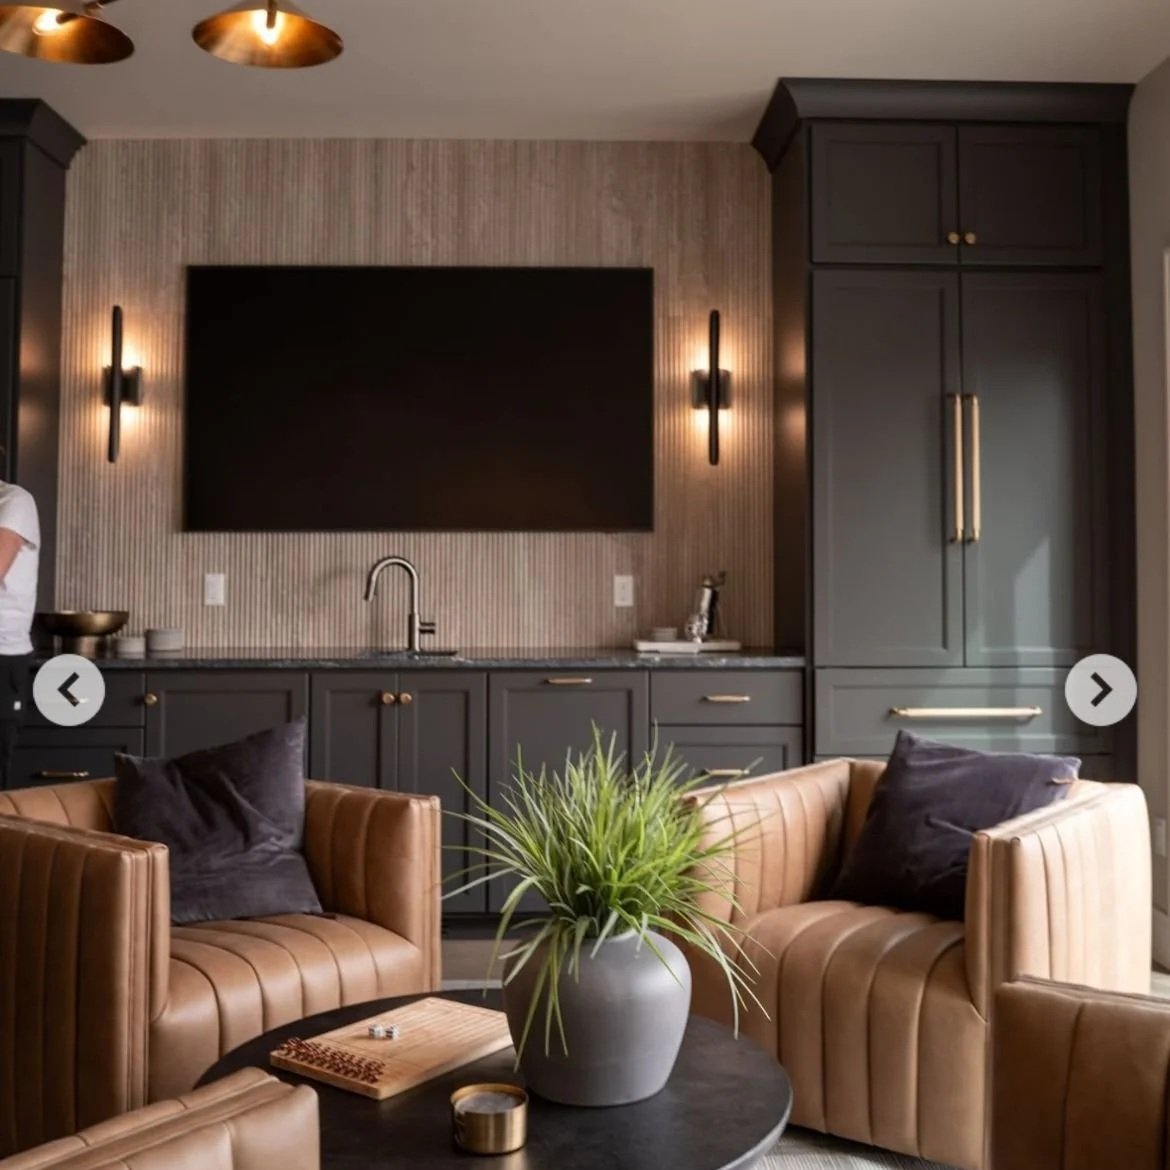
Strategic Flow
A well-planned basement feels open but intentional. Define how each zone will function before you build, so every square foot works for your life.
Map out distinct activity zones—bar, gym, play area, or theater.
Keep sightlines open to create natural flow between spaces.
Use flooring changes to define zones instead of adding walls.
Add a coffered ceiling to highlight a seating area.
Raise the floor for theater seating to improve visibility.
Mix textures—stone, wood, and built-ins—to add warmth and depth.
Give each zone its own mood lighting for balance and atmosphere.
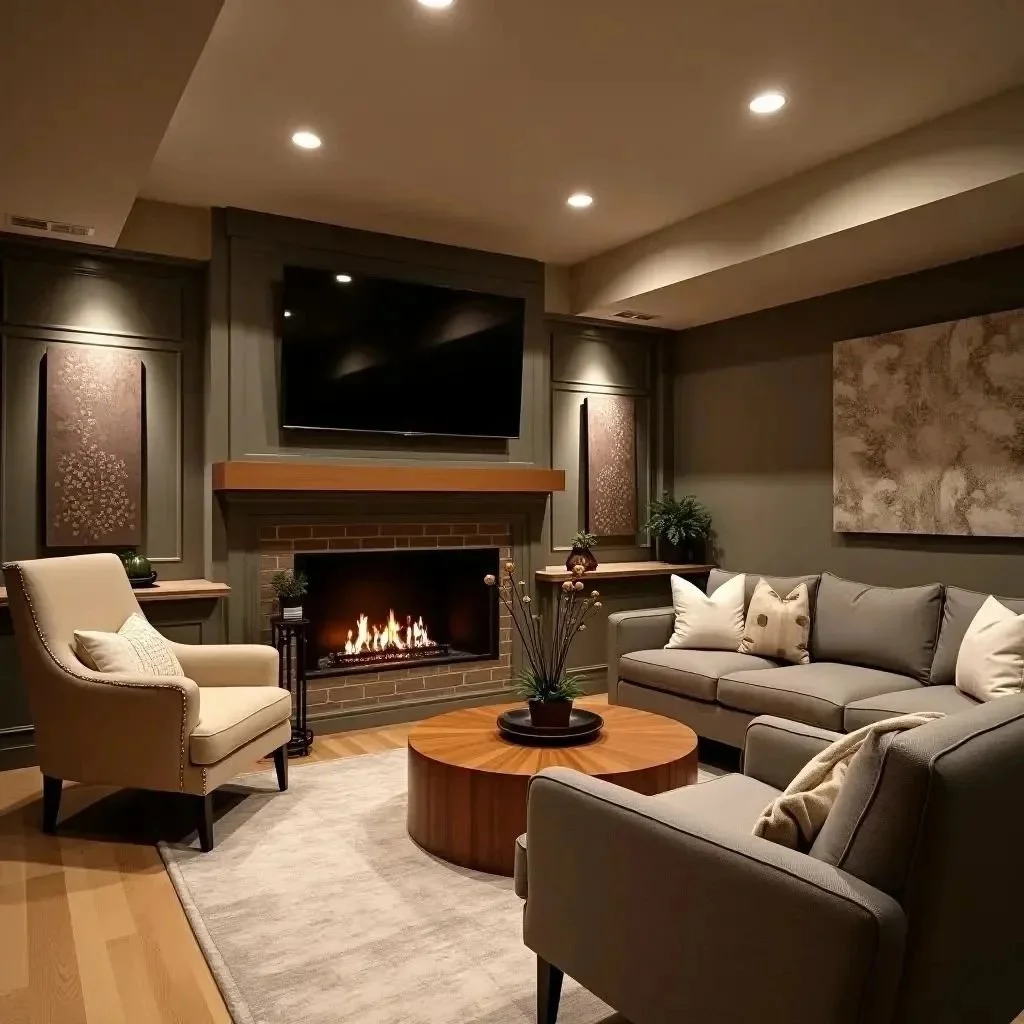
2. Maximize Your Lighting with Mood Control
Layered lighting is what separates a finished basement from a lived-in one. Combine ambient, task, and accent lighting to make the space feel bright, balanced, and built with intention.
Ambient lighting: even illumination that keeps the space open and airy.
Recessed can lights to save headroom.
Flush-mount fixtures for uniform brightness.
Cove lighting or concealed LED strips for soft, indirect glow.
Task lighting: focused light where you need it most.
Pendant lights over a bar, island, or game table.
Under-cabinet LEDs for functional bar or kitchenette counters.
Accent lighting: depth and drama that showcase detail.
Wall sconces to warm dark corners and elevate the feel.
LED strips behind TVs, shelves, or stairs for a modern finish.
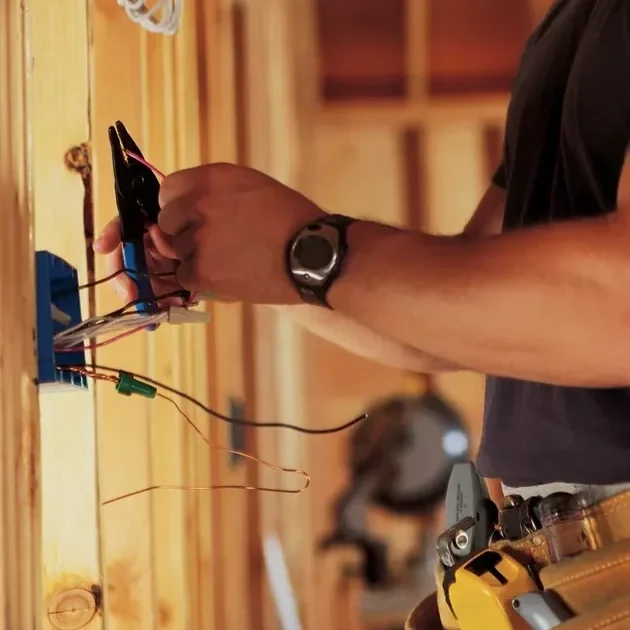
3. Future-Proof Your Basement with Smurf Tubing
Running Smurf tubing during framing saves you from ever opening a wall again. It creates hidden pathways for wiring upgrades as technology evolves.
Home theater ready: route tubing from your media cabinet to the TV wall and speaker or projector spots. Use 1"–1.5" tubing for easy cable pulls.
Networking flexibility: connect your main internet entry to a central cabinet and any future home-office jacks.
Whole-home connectivity: run a large conduit to the floor above for future Wi-Fi, cameras, or smart-home wiring.
Install it right:
Plan TV, speaker, and office locations before framing.
Choose larger tubing so new cables fit later.
Leave a pull string inside and tape the ends to keep them clear.
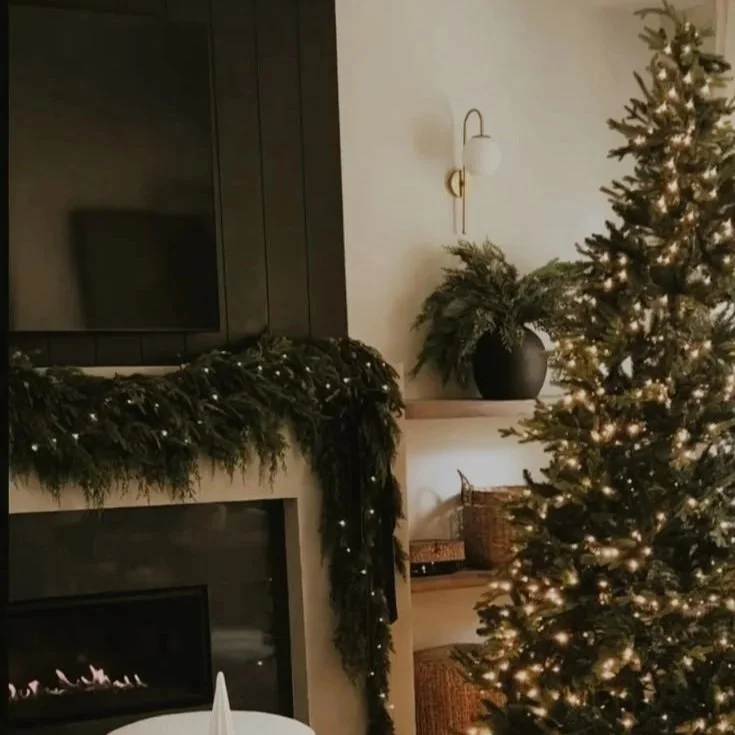
4. Plan Where the Basement Christmas Tree Will Go
This part is so much fun! It’s a small detail that makes a big difference and one of our favorite parts of design planning.
Decide where your Christmas tree will live before framing.
Add dedicated outlets so you never have cords running across the floor.
This step almost always sparks ideas for other outlets you haven’t thought of yet: lamps, bar appliances, game consoles, accent lighting, even that hidden phone charger near the couch.
Thinking ahead now means your finished space feels effortless year-round.
5. Safety, Safety, Safety
Quality craftsmanship starts with doing things the right way, every time.
Always verify your contractor is licensed, insured, and code-compliant.
At RenoVisions, we hold a City Certified Contractor’s License and follow every safety and inspection standard from framing to finish.
Safe work isn’t just about compliance, it’s what protects your investment and your home for years to come.
Ready to see what’s possible downstairs?
Let’s talk vision, budget, and fit. No pressure. Just clarity on your best next step.
p. 402-658-5356
e. adam@renovisionsomaha.com